Text on wood
DIY Text on wood
The internet and shops are full of them. Text on wood. Nice text plates for your interior with profound sayings or fun texts. There are DIYs or tutorials everywhere on how to do this yourself. So I thought it was time to try that too.
Since I'm always making something, I already had all the supplies at home.
DIY text on wood
A text on wood, you can find it everywhere and it is actually not that difficult to make. There are many ways to get your favorite text on wood. After some research I had enough choice.
Now it was just a matter of finding the right method. As a result, the back of this project is now full of experiments. Of course we keep that a little secret.
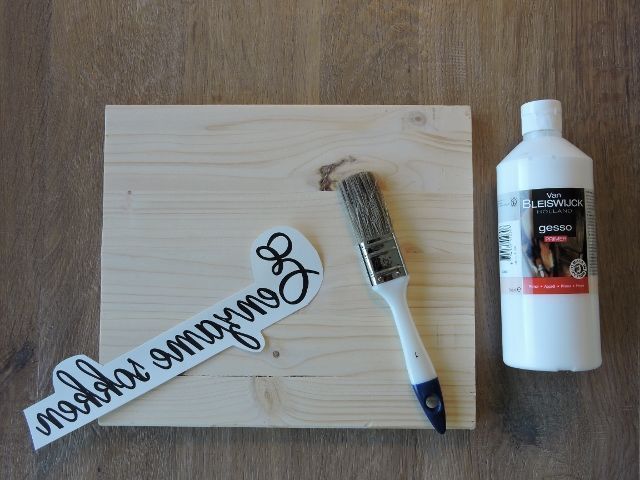
What do you need?
- A plank (scaffolding wood, cupboard plank, residual waste, everything is sufficient as long as it is somewhat flat)
- Gesso or primer. (I used Gesso from the Action)
- A brush
- Modpodge (not pictured but for sale at Xenos, Action)
- Your text printed in mirror image
How do you proceed with a text on wood?
First of all I pre-processed the plank with Gesso. This ensures that the board gets a whitewash appearance and the text stays better on your board. I did one layer over it myself. If you want a tighter look, you can choose to do a few layers on top of each other.
Let this dry very well.
Then you smear the entire board with mod podge. Modpodge can be compared to a layer of varnish. You can use this for a lot of projects.
It is available in matt or gloss, among other things, I chose gloss myself. If the mod podge is still wet, place the text with the printed side on it. Press it firmly and let it dry overnight.
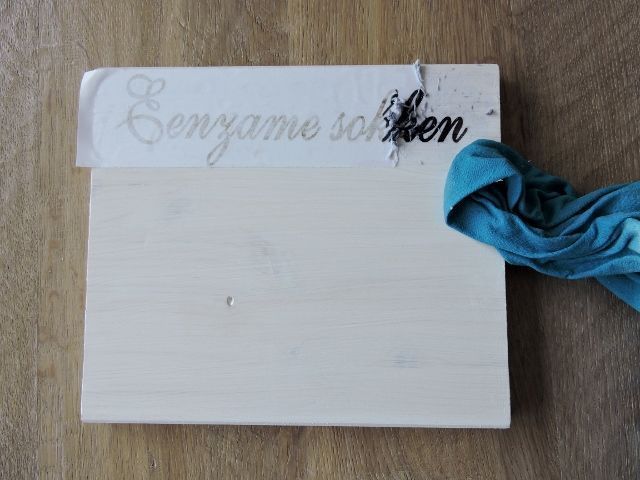
When your mod podge is dry, it's time to reveal your text. You do this by wetting a tea towel thoroughly and rubbing it over the paper. The intention is that you roll off the entire white paper layer.
It is also possible to wet the paper with a plant sprayer. Secretly I was a bit lazy and I kept the whole shelf under the tap. Rolling takes a little practice.
If you do it too carefully you will be left with a layer of paper, if you do it too hard you will rub off your text.
Ultimately, the intention is that you only have the black text with an authentic look. Optionally, you can give the entire board a thin layer of mod podge as a layer of varnish.
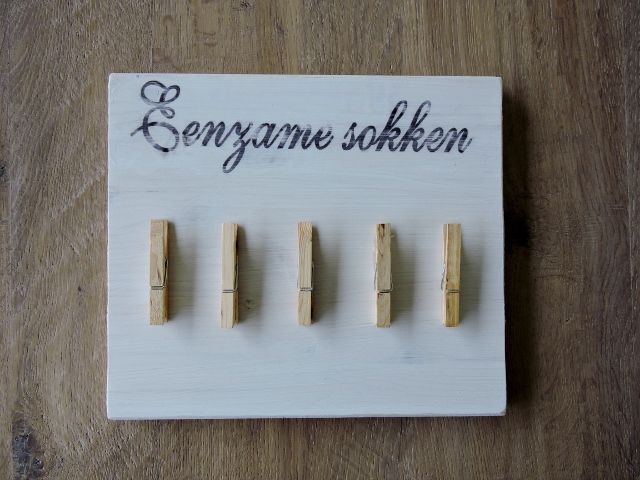
Lonely socks
I chose the text ‘Lonely socks’ because I always, mysteriously, lose socks in the washing machine or dryer. I glued a number of pegs on the board with the glue gun. Now the shelf shows off at my washing machine. When I find loose lonely socks again, they can wait on a peg until their ‘partner in crime’ reappears.
This prevents a lot of loose socks in our sock drawer.
What are you going to make with this technique? What do you think is a cool text on wood?
♥ ♥ ♥ Affiliate links are used on Fulltime Mama. This means that if you click on one of the links, we may receive a small commission. It costs you nothing extra, but it does give us something. With these proceeds we can maintain this website.
We also sometimes get paid for an article or we get a product in exchange for a blog post. Our opinion therefore remains unchanged and honest. For more information you can read the disclaimer. ♥ ♥ ♥