Сlay hedgehog
DIY clay hedgehog
This past week we had some rainy days. In between showers we went outside but if it was very wet we had to entertain ourselves inside. Luckily my little man really enjoys crafting so we got to work again.
To keep with the autumn theme we made a hedgehog from clay and autumn materials.
What you need?
For this DIY you don't need that much. We used a piece of white self-drying clay and autumnal materials. We used the fruits of the tree but you could also use the ‘helicopters’ or the maple tree.
Anything that looks like a hedgehog's spines will do.
Clay hedgehog
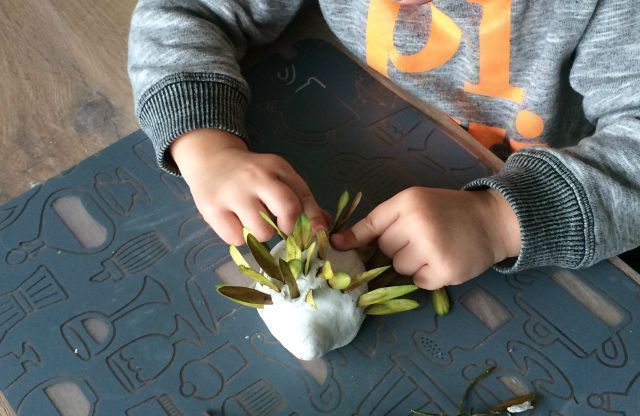
First we made a simple hedgehog shape from the white clay. Make sure you knead the clay well, this works easier. A hedgehog has a bit of a pointy snout so you shape this to the ball.
Then you press the bottom a little flat so the shape stays put.
The hedgehog shape itself is a little tricky for a toddler to make but with a little help from mom it worked out fine. When the shape is ready you can stick the fruit in it. I marked with a line from which the little man could poke the fruits.
It was particularly tempting for him to stuff the face as well.
Finally we made two eyes with a skewer and your clay hedgehog is done. Leave it alone for at least one night so it can harden completely.
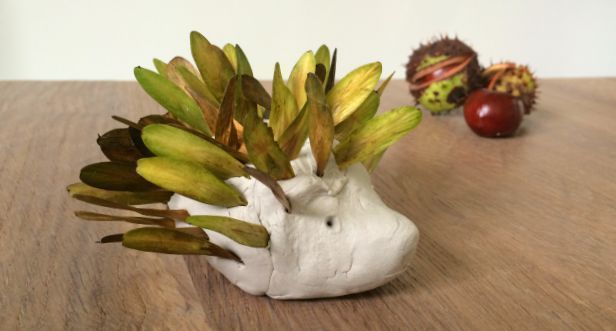
Our hedgehog is on the dining table with all the other autumn crafts. As fall progresses I will probably have to make room for new crafts but for now it looks very cozy.
Do you also make from clay? Do you have any fun tips for us?
♥ ♥ ♥ Fulltime Mama uses affiliate links. This means that if you click on one of the links, we may get a small commission on it. It costs you nothing extra, but it does give us something.
With these proceeds we can maintain this website. We also sometimes get paid for an article or receive a product in exchange for a blog post.
Our opinion remains unchanged and honest. For more information you can read the disclaimer. ♥ ♥ ♥